전체 글 167

노마드 코더 - 바닐라 JS로 크롬 앱 만들기 - addEventListener

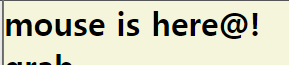
const title = document.querySelector(".hello:first-child h1"); function titleClick() { title.style.color = 'blue'; } function titleMouseEnter() { title.innerHTML = "mouse is here@!" } function titleMouseLeave() { title.innerHTML = "mouse is gone!" } title.addEventListener("click", titleClick); title.addEventListener("mouseenter", titleMouseEnter); title.addEventListener("mouseleave", titleMouseL..

노마드 코더 - 바닐라 JS로 크롬 앱 만들기 - or, and 연산자

프롬프트 창에 나이를 입력하면 콘솔창에서 확인할 수 있음. const age = parseInt(prompt("your age")); //or 연산자 true || true === true false || true === true false || false === false //and 연산자 true && true === true true && false === false false && false === false // console.log(isNaN(age)); if(isNaN(age) || age < 0){ // age가 숫자가 아니거나 0이하일 때 console.log("0이상의 숫자를 입력해주세요"); } else if(age < 18) { // age가 18 미만일 떄 console.log("..

노마드 코더 - 바닐라 JS로 그림 앱 만들기- 이미지 파일버튼 추가

파일 선택 버튼이 추가 되었음. ​ //html accept ="image/*" 파일은 이미지파일로 이미지 파일형식은 모든 파일 Fill Destroy Erase //js const fileInput = document.getElementById("file"); //file function onFileChange(e) { const file = e.target.files[0]; const url = URL.createObjectURL(file); //url 가져오기 const image = new Image(); image.src = url;// html 코드와 동일 image.onload = function() { ctx.drawImage(image, 0, 0, canvasWidth, canvasHei..

노마드 코더 - 바닐라 JS로 그림 앱 만들기- 그림판 만들기

대충 모양 나오는 그림판 ​ //html data-color 값을 줘서 js에서 불러올 수 있게함. 'color'는 사용자 임의대로 지정할 수 있음. data-potato, data-abc.. Fill Destroy Erase //js 코드가 너무 길어서 정리하고 싶은데 일단 나중으로 미뤄본다. const colorOptions = Array.from( document.getElementsByClassName("color_option") ); forEach를 써야하는데 배열로 바꿔주어야해서 array.from을 씀. const modeBtn = document.getElementById("mode_btn"); const destroyBtn = document.getElementById("destroy_b..

노마드 코더 - 바닐라 JS로 그림 앱 만들기- canvas로 그림 그리기

//.js const canvas = document.querySelector("canvas"); const ctx = canvas.getContext('2d'); canvas.width = 800; canvas.height = 800; ctx.fillRect(200 - 40, 200, 15, 100); ctx.fillRect(350 - 40, 200, 15, 100); ctx.fillRect(252 - 40, 200, 60, 200); ctx.fillRect(212, 420, 25, 150); ctx.fillRect(246, 420, 25, 150); ctx.arc(280 - 40, 140, 50, 0, 2 * Math.PI); //num * Math.PI 원의 둘레 구하기 위한 공식 1이면 반원 ct..

노마드 코더 - 바닐라 JS로 그림 앱 만들기- 선그리기

누추한 조개껍데기 만드는방법 const canvas = document.querySelector("canvas"); const ctx = canvas.getContext('2d'); canvas.width = 800; canvas.height = 800; ctx.lineWidth = 2; const colors = [ "#FFAD9E", "#D7AFFF", "#B3D89C", "#9FE2BF", "#F0F0F0", "#A2B9F2", "#E2B1E1", "#B8E080", "#FFD1DC" ] function onclick(event){ console.log(event); ctx.beginPath(); ctx.moveTo(0,0); const color = colors[Math.floor(Math.ran..

따옴표와 백틱의 차이'',"",``

1."따옴표 사용했을 때" const name = "Alice"; const greeting = "Hello, " + name + "!"; console.log(greeting); // 출력값: "Hello, Alice!" 2. `백틱 사용했을 때` const name = "Alice"; const greeting = `Hello, ${name}!`; console.log(greeting); // 출력값: "Hello, Alice!" - `` 백틱을 사용하면 코드를 더 간결하게 쓸 수 있고 html작성할 때의 구조로도 작업 가능함. 예제는 gpt에서 가져옴,,

언어/JavaScript 2023.05.24

var, let, const 변수 선언의 차이

요즘은 var를 권장하지 않는다. var를 사용하면서 발생하는 문제점 ​ 1. 상수인지 변수인지 구분이 안된다. ​ 2. 변수는 let으로 사용한다. var a = "1"; var a = "10"; var는 위에서 1이라고 정의했어도 아래에서 10이라고 재정의가 가능해 스크립트 오류가 발생할 확률이 높다. 3. scope의 차이 var x = 1; if (true) { var x = 2; console.log(x); // 출력값: 2 } console.log(x); // 출력값: 2 let x = 1; if (true) { let x = 2; console.log(x); // 출력값: 2 } console.log(x); // 출력값: 1 var는 블록문 안에서 선언되었어도 밖에서 참조할 수 있고 let이..

언어/JavaScript 2023.05.24

vue.js 2일(같은 레벨 간의 통신, router)

같은 레벨 간의 통신 v-on:pass="deliverNum" / v-on:하위 컴포넌트에서 발생한 이벤트 이름="상위 컴포넌트의 메서드 이름" - root로 데이터 10을 보냄 v-bind:propsdata="num" / v-bind:프롭스 속성 이름="상위 컴포넌트의 데이터 이름" - app-content -> root를 통해 데이터 10을 받음 *root를 통해 데이터 전달받기 var appHeader = { template: 'header', props: ['propsdata'] } var appContent = { template: 'contentpass', methods: { passNum: function() { this.$emit('pass', 10); } } } new Vue({ el: ..

언어/Vue.js 2022.12.30

vue.js 1일(component, props, event)

v-bind v-bind:프롭스 속성 이름="상위 컴포넌트의 데이터 이름" v-bind는 html의 속성인 id, class, style 등에 대해 model의 데이터를 연결할 때 사용된다. v-bind는 전달인자로 연결하려는 속성을 지정해주면 되고 편의상 v-bind는 생략하고 사용하기도 한다. -> root에 있는 데이터가 app-header와 app-content에 들어가게 함 v-on v-on:하위 컴포넌트에서 발생한 이벤트 이름="상위 컴포넌트의 메서드 이름" -> vue 이벤트 창에서 확인 가능 -> add 버튼을 누르면 data의 num이 1씩 증가 {{ num }} var appHeader = { template: 'Click me', methods: { passEvent: function..

언어/Vue.js 2022.12.28